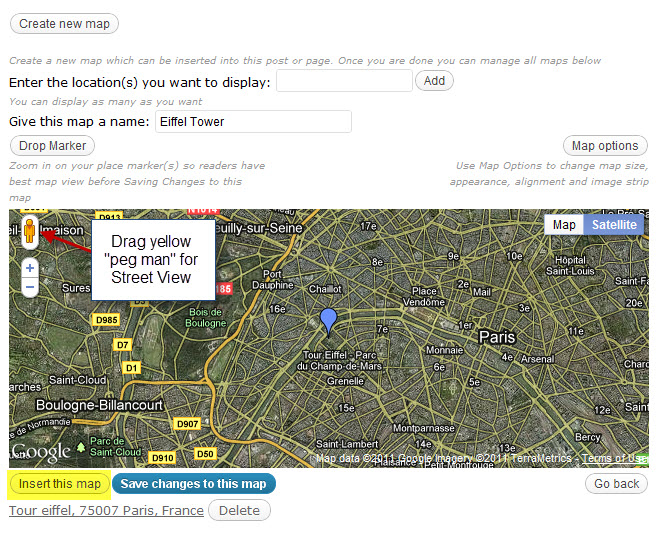
Adding A Map To Your Blog or Online Site
Maybe this could be tried on the “Fake Facebook” assignment for introducing historical characters.
It’s now real simple to add a Google Map to your blog!
Here’s how:
1. Make sure the Google Maps plugin is activated in the Plugins menu.
2. Look for the Add Map icon that now shows in your page and post editor.

3. Complete the information by putting in an address or place name of what you want to show.

4. Click on “Insert this map” and a code will be placed in your text which will automatically show the map when you publish.
5. For “Street View” simply drag the yellow “peg man” from the top left corner into the map where you want him to be. Move him around and choose the view you want to display. Visitors to your blog will be able to move him around, but when they refresh the page or visit again, he will always be reset to the starting place you choose.
5. To make changes, simply click on the map icon again.
Other Options
1. You will also find a Google Maps widget under Appearance > Widgets which lets you place a map in a sidebar.
2. By going to Settings > Google Maps you will be able to set the default size and views of all maps you create.